Virtual Twilight vs Natural Twilight: How to Get the Dusk Shot That Leads Your Listing
A twilight exterior is often the photo buyers see first. You can capture it at dusk or create it from a daytime photo. Here is how to decide, and how to shoot for each.
UVUV AXIS editorial team7 min read
DaytimeVirtual twilight
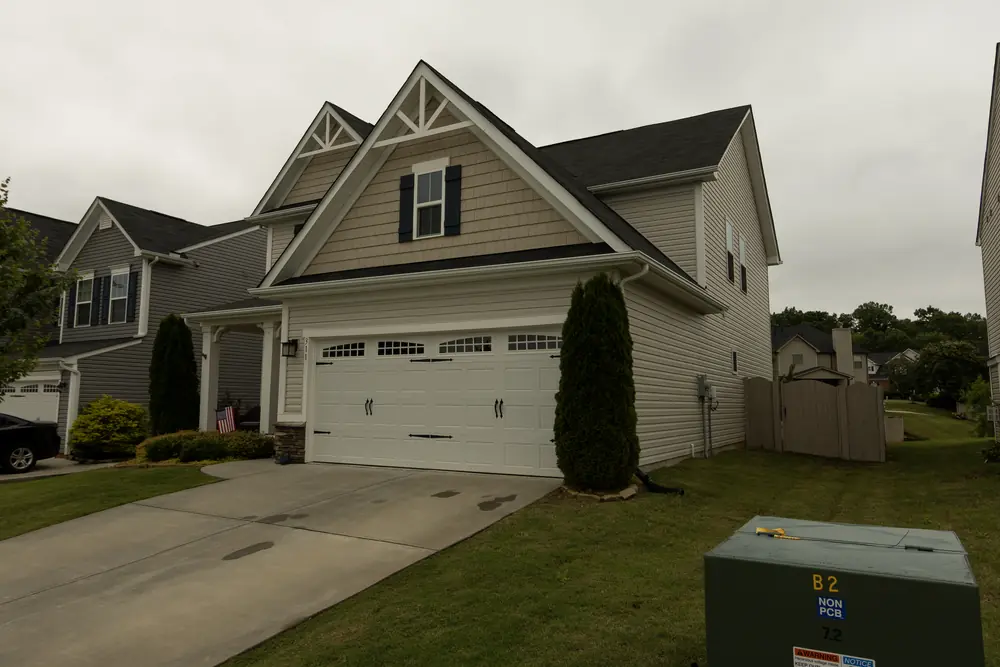
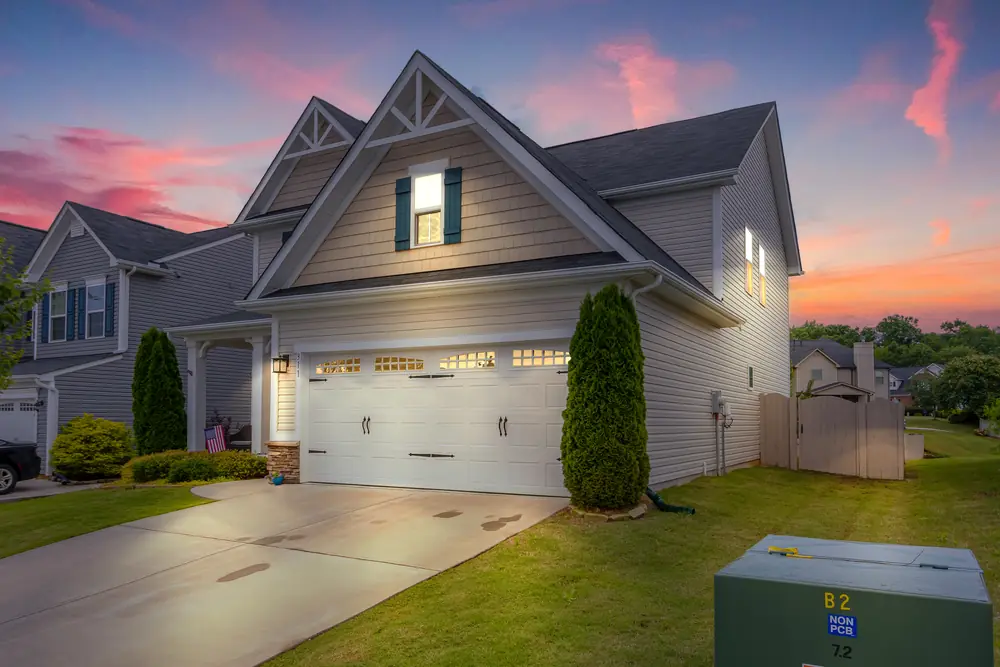
A virtual twilight edit: daytime photo (left), finished dusk scene (right). Drag to compare.
A house photographed at dusk, with warm light in the windows and color in the sky, feels inviting in a way a midday photo rarely does. That is why so many agents use a twilight image as the first photo in a listing. There are two ways to get one: shoot the property at dusk and edit the result, or photograph it in daylight and have an editor turn day into dusk.
Key takeaways
Natural twilight starts with a photo shot at dusk. Editing balances the low light and brings out the color already there.
Virtual twilight starts with a daytime photo. The editor adds a sunset sky, softens shadows and lights the windows.
Natural twilight needs an extra visit at the right time. Virtual twilight fits into the shoot you already have.
What natural twilight editing involves
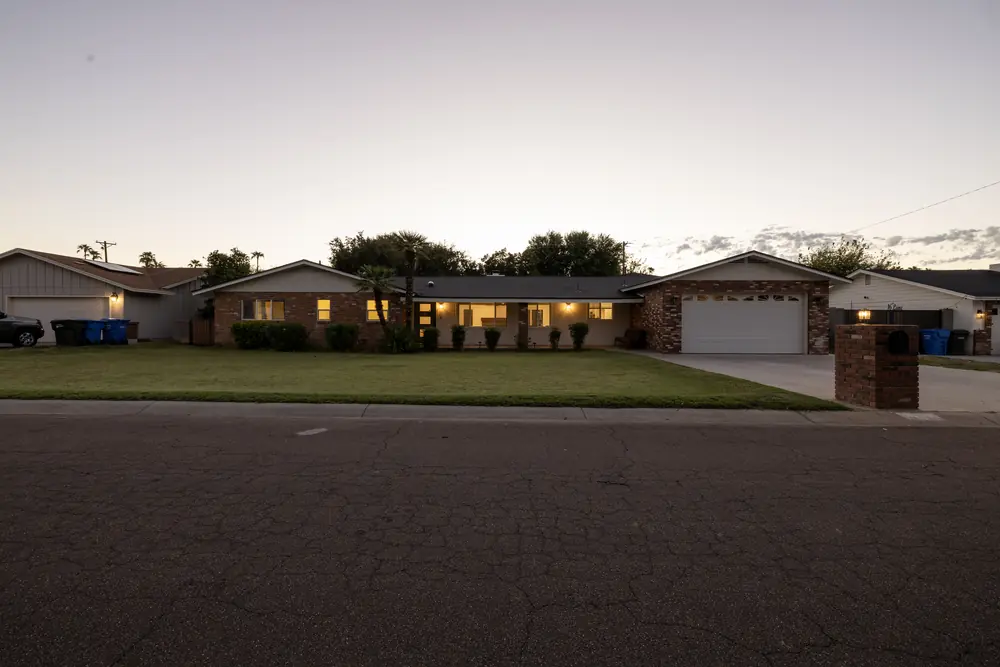
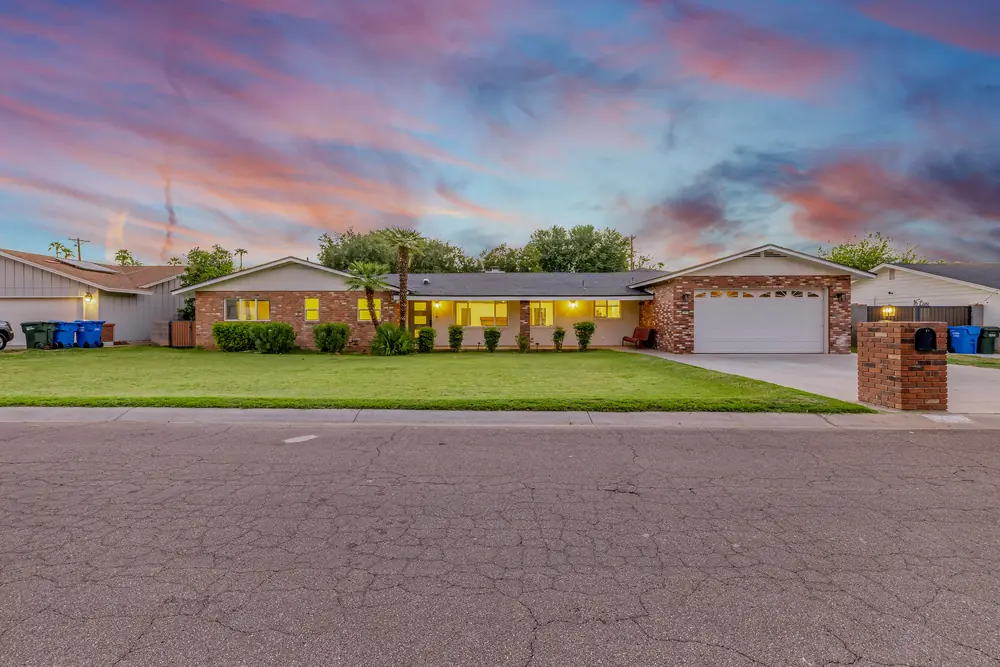
For natural twilight, the photographer returns to the property around sunset and shoots while there is still color in the sky and the outdoor light is soft enough to balance with the lights inside the house. The editor then works on those frames: lifting detail out of the shadows, balancing the warm interior light against the cooler sky, correcting color and cleaning up noise from the low light.
The result looks natural because it is real. The sky, the light on the walls and the glow from the windows were all captured on the night.
How to shoot for natural twilight
Arrive before sunset to set up your angle and tripod while it is still light.
Turn on every interior and exterior light, and open the blinds on the windows that face the camera.
Shoot a series of frames as the light fades. The best balance between sky and windows lasts only a short time.
Bracket each angle so the editor has detail for both the bright windows and the darker garden.
The trade-offs
Natural twilight depends on the weather and the clock. A cloudy evening can leave you with a flat grey sky, and the window for the best light is short. It also means a second visit to the property, or a long wait after the daytime shoot.
What virtual twilight editing involves
Virtual twilight, sometimes called day to dusk, starts with a normal daytime exterior. The editor replaces the sky with a sunset, darkens and warms the scene, removes hard daytime shadows and adds light to the windows and exterior fittings so the house appears lit from inside.
Because it is created in editing, you can choose which listings get a twilight shot after the shoot, with no return visit and no dependence on the weather.
How to shoot a daytime photo for virtual twilight
Choose the most flattering front angle, the same one you would use for the lead photo.
Shoot in soft light if you can. Strong midday shadows take more work to remove.
Clear the driveway of cars and bins, or plan to order object removal for them.
Turn on exterior lights. It helps the editor place the glow realistically.
Natural vs virtual twilight compared
Natural Twilight
Virtual Twilight
Starting photo
Shot at dusk
Shot in daylight
Extra time on site
Yes, a dusk visit
No
Depends on the weather
Yes
No
What the editor does
Balances low light, color and noise
Adds sunset sky, lit windows and dusk tones
UV AXIS price
$2.00 / image
$3.00 / image
Dusk shotNatural twilight
A natural twilight edit: the frame shot at dusk (left) and the finished image (right).
Which should you choose?
Choose natural twilight for premium listings where you are already planning a dusk visit, or when the photographer can be on site at sunset without disrupting the schedule.
Choose virtual twilight when you want a twilight lead photo without an extra trip, when the weather is unreliable, or when you decide after the shoot that a listing needs one.
Some agents use both: natural twilight for top-end homes, and virtual twilight for the rest of their listings so every property gets a strong first photo.
Have a daytime exterior that deserves a dusk version?
Send it with your free trial and see it as a twilight scene before you order.
A virtual twilight changes the sky and lighting in a photo. Many property portals and MLSs have rules on digitally altered images, so check what applies to you and label the image where it is required. Twilight edits should show the property as it is, at a different time of day. They should not hide features buyers need to know about.
Edits that pair well with a twilight shot
Lawn replacement, if the grass in front of the house is dry or patchy.
A consistent editing workflow for the rest of the listing, so the interiors match the quality of the lead photo.
Frequently asked questions
Is virtual twilight the same as day to dusk?
Yes. Day to dusk is another name for virtual twilight: a daytime exterior edited to look as if it was taken at dusk, with a sunset sky and lit windows.
How much does a twilight edit cost?
At UV AXIS, natural twilight editing is $2.00 per image and virtual twilight is $3.00 per image. Final price depends on volume and additional requirements.
Can any daytime photo become a virtual twilight?
Most front exteriors work well. Photos taken in soft light, with the house clearly visible and the driveway clear, give the most convincing results.
The workflow you choose decides how long you spend on site, what you send to your editor and how the finished rooms look. Here is how the three main options compare in practice.
Occupied homes have too much in them. Vacant homes have too little. Here is how to pick the edit that fixes each room, and how to shoot so the result looks natural.
Your next listing could be online tomorrow.
Upload today and download listing-ready images within 24 hours. Your first 3 are free.